Quick MiniGames
P1:
Feature 1: Display Mouse position
Input: Mouse location
Process: assign mouse X, Y position to text object
Output: Text is displayed in the lower Right corner showing X and Y of the mouse.
Difference: It's in the right corner, and it's a legacy text. (Not a lot can be changed)
Feature 2: Create Object, Destroy Object
Input: Mouse Right Click
Process: (Optional) Mess with colors to pick what you want to use, then click apply, then right click on canvas to create a square. To destroy, select “Erase” from the dropdown menu, then select squares you made.
Output: an object is created and drawn where the mouse is clicked.
Difference: This feature is different from class projects because my input is the right click and mine only draws a square, and my destroy is built into the dropdown, and only deletes created objects.
Feature 3: Change Base of Colors
Input: Dropdown Menu
Process: Select dropdown menu, choose basic 4 colors to paint with (Yellow,red,blue,green)
Output: Created object will be the color displayed in dropdown
Difference: I added the color yellow, which I had to make from the combination of red and green.
Feature 4: Mix colors
Input: Sliders (Red, Green, and Blue)
Process: Use sliders to combine colors to make a new one
Output: Move RGBY sliders to change colors
P2:
Feature 1: Change Prefab
Input: Dropdown menu
Process: Left Click on Dropdown menu, left click on prefab
Output: Selected prefab will now be saved as active prefab to draw with right click.
Feature 2: Clear All Button
Input: Button
Process: After drawing prefabs, click button to erase all created prefabs
Output: Clears created Prefabs
Difference:
Feature 3: Rotate All prefabs
Input: Slider
Process: After creating prefab, use slider to rotate(clockwise)
Output: Created object will rotate according to scale of where use stops slider
Feature 4: Change the size of prefabs
Input: Slider
Process: Use slider to change size of prefab
Output: Bigger or smaller prefab (depends on where user stops slider)
Difference: Scale .2 to 1
Feature 5: Create random prefab
Input: toggle
Process: Turn on toggle to create random prefab out of prefabs already created
Output: Random Prefab
P3:
Feature 1: Move Figure
Input: Mouse Key Arrows
Process: Use mouse keys to move ( up, down,left,right )
Output: Moves prefab1
Feature 2: Eat Animation
Input: Press e
Process: When e is pressed prefab1 switches its mode to eat, then when prefab 1 runs into prefab 2 the animation will be activated
Output: “Eats” prefabs created by right click
Feature 3: Knock down Animation
Input: Press K
Process: When K is pressed prefab1 switches to knock down mode, then when prefab 1 runs into prefab 2 the animation will be activated
Output: “Knocks down” prefabs created by right click
Feature 4: Burn Animation
Input: Press B
Process: When b is pressed prefab1 switches to burn mode, then when prefab 1 runs into prefab 2 the animation will be activated
Output: “Burns” prefabs created by right click
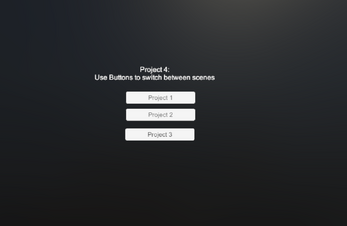
P4:
Feature 1: Camera Switch to main camera
Input: Button
Process: Once button is clicked the camera is moved to main camera
Output: Switches camera to “main Camera
Feature 2: Camera Switch to left side camera
Input: Button
Process: Once button is clicked the camera is moved to left side of the pathway
Output: Switches camera to “main Camera
Feature 3: Camera Switch to right side camera
Input: Button
Process: Once button is clicked the camera is moved to right side of the pathway
Output: Switches camera to “main Camera
| Status | Released |
| Platforms | HTML5 |
| Author | BattsKahvon |
| Made with | Unity |
